

You cannot beat a soft chewy simple white sourdough bread. This is a classic loaf and one that is perfect for any beginner sourdough bakers. Using very simple ingredients and little effort this bread is utterly delicious.
Key Things to Know
- You will need an active bubbly sourdough starter. It is wise to feed your starter around 5-8 hours before making this bread recipe. Also what you feed your starter will impact your bread, like say you fed it rye or wholewheat then these elements will be there in your bread.
- You do not need bread flour. A high quality all purpose white flour preferably organic if you can.
- Use room temperature water. Cold water tends to slow the whole process down, while hot water will kill your sourdough starter completely. If it is the dead of winter and your home is quite cold then using a tepid slightly warm water might work in your favour.
- If your city water is anything like mine then you might want to considered filtering it also. Our water has so many minerals and smells slightly of bleach which isn’t ideal so we filter or buy water in. Use your own discretion here, I know a lot of people have filter systems already. You may want to check out this post for more information.
This post includes affiliate links please see my full disclaimer.
What you need for White Sourdough bread
Tools:
- A large mixing bowl
- Plastic wrap or plastic bag
- Tea towels
- Banneton this is basket used for bread proofing and well worht investing in if you want to make sourdough bread. You could also use a wicker style bread basket or bowl lined with a cotton tea towel
- Dutch oven with a lid
Ingredients:
All purpose flour. You do not need bread flour for this recipe, although do try to buy a high quality flour if you can.
Water. Try to use filtered room temperature water, avoid cold water.
Active bubby starter. Make sure that is was fed at least 5 hours previous, also whatever it is fed with will affect your final loaf.
Salt. I have used a pink rock salt which is quite a mild salt, but a sea salt would work just fine too. If you use table salts then maybe reduce the amount slightly.
Olive oil. extra virgin or virgin oil.

Please note this video is a slightly different recipe but the technique is the same.
Timing Schedule
This timing schedule for this white sourdough bread is just a suggestion it can be changed or adapted to your own schedule. Locations and room temperatures also play a big part in proofing so that may affect timings also.
How to Make Classic White Sourdough Bread
The above is a break down with timings let me show you a more in depth method. This will not include specific times of day.
Begin by placing your water and sourdough starter into a large mixing bowl, mix these together until the starter has dissolved into the water. I find this helps it to be evenly distributed throughout the dough.

Add in the oil then the flour and salt. You can use your hand for this next part but I have found a spoon is easier and less messy. Mix all of the ingredients together until they come together and for a very rough looking dough ball.

Cover this with a damp tea towel and leave it to rest for around thirty minutes. this will allow the flour to absorb the water. A damp tea towel also stops the dough from drying out and forming a dry crust on the outside.
Stretch and folds
Now we are going to go in with the stretch and folds. To do this take an edge of the dough ball lift it up and fold it over the dough, turn the bowl a quarter and repeat. Keep repeating this process until the dough starts to firm up and it becomes harder to pull on the dough. Cover and rest for twenty minutes.

After twenty minutes you will repeat that last step of stretch and fold. Again resting for twenty minutes, Repeat this another two times so that makes a total of four stretch and folds.
If you feel your dough needs another round then go ahead and do a fifth round of stretch and folds.
After the stretch and folds are complete and you are able to do the window pane test on your dough (see images). Either place the dough ball into a plastic tub or you can also leave it in the bowl, cover the container with either a plastic bag or with plastic wrap. I found plastic shower caps work really well for this and can be reused over again.
Proofing
Place to the side in a warm dry location that isn’t in your way and leave it now to proof for around twelve hours. This is an average time, for you it could be ten hours or fourteen, you want the dough to have doubled in size. Sourdough does take longer than other yeasted doughs so keep that in mind.

Once the dough has proofed tip it out onto a clean surface. Try to avoid flouring the surface you do not want to add any more flour if you can. Leave the dough ball to rest for around ten to twenty minutes this allows the surface to dry out a little making it easier to work with.
Shaping
Flip the dough ball and pull into a rough square shape. now fold over one edge to just past the center and then fold the opposite edge over that fold.
Now from the narrow edge roll the dough ball up into a ball. Using both hands pull the ball towards you gently. This will add tension to the top of the ball, gently lift the dough ball away from you and repeat the pulling technique again, repeat this a couple more times.

Flour the top of you dough ball and pick it up with the top side in the palm of your hand, drop it into a banneton. If your bannetons don’t have liners like min then I tend to line them with cotton tea towels, these work really well.
Cover the banneton with plastic or place them into a plastic bag. Put it into the fridge to do the next round or proofing, this will need to be for no less than four hours. It can also be left in the fridge for up to twelve hours so can be left over night if needed.

Baking the white sourdough bread
After four hours or so remove the banneton from the fridge and place to the side. Pre-heat the oven to 500F, 260C. Place the Dutch oven into the oven while it preheats so that it can also preheat, you want it to be hot.
When the oven has preheated carefully tip your dough onto a piece of parchment paper. If you have a razor blade you can score marks into the dough, I tend to just do a half moon shape.

Carefully remove the Dutch oven and its lid and place the parchment with the dough ball on into it. Place the lid back on, don’t forget it is hot use an oven mitt! Place it back into the oven and bake for thirty minutes.
Remove the lid and bake for another thirteen minutes.
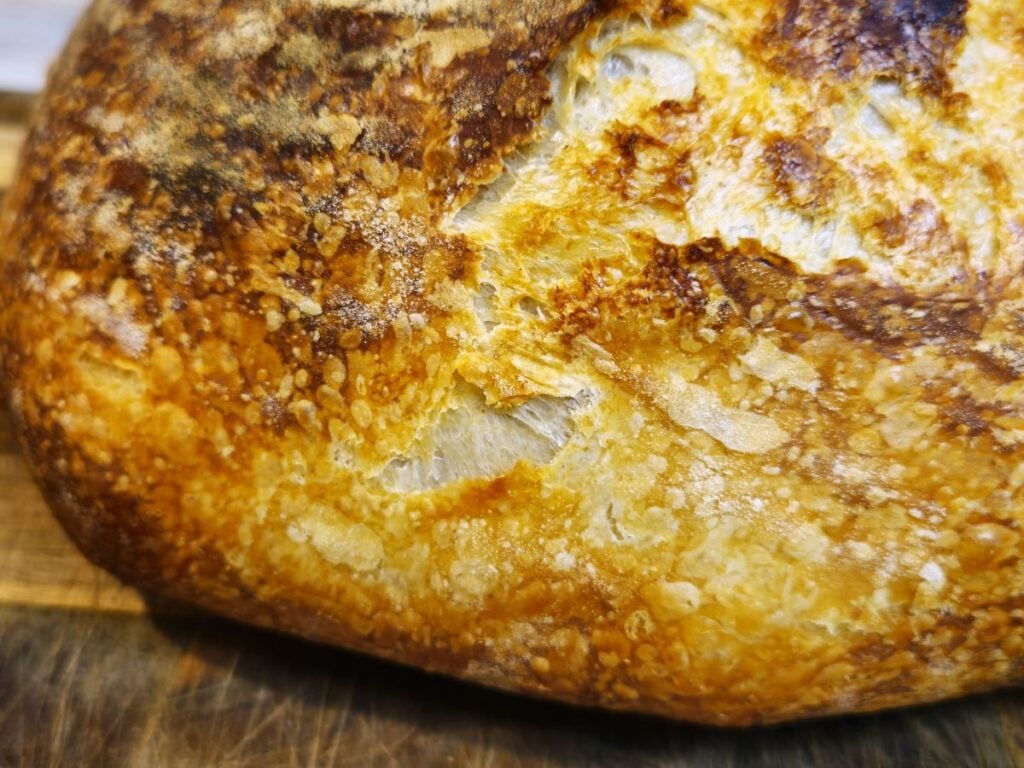
Place the baked bread onto a cutting board to cool completely.

White Sourdough Bread FAQ’s
- Do I really need a Dutch oven? No, but it is easier to use one and you will get a better crust. If you don’t have one then place an oven proof dish of boiling water into the oven to add steam, this will help you to get a lovely crust. Also reduce the oven temperature to 475F, 245C, do not use convection.
- What are bannetons? They are baskets designed specifically for proofing bread. They tend to come with cloth lines making them easier to clean and maintain. If not line them with cotton tea towels.
- My dough hasn’t doubled after 12 hours? This could mean that your room is quite cool and it needs more time, be patient sourdough can take a while to rise. The only other problem would be with your starter which is quite unlikely if it was bubbly to begin with.
- The bottom of my bread burnt. I have had this happen so many times and it so disappointing. I came across a tip that said to add a layer of rice into the bottom of the Dutch oven and this totally worked. Because you are using parchment paper the dough should never come into contact with the rice.
I really hope that you enjoy making this white sourdough bread.

Classic No Knead White Sourdough Bread
A deliciously soft and chewy white sourdough bread made using the stretch and fold method. It will leave you wanting more.
Ingredients
- 435g Room temperature water
- 120g Active sourdough starter
- 20g (2 tbsp) Olive oil
- 660g All purpose white flour
- 15g (2 tsp) Sea salt
Instructions
- Begin by placing the water and sourdough starter into a large mixing bowl and mixing them together until the starter has fully dissolved into the water. This ensures it is evenly distributed throughout the dough. Add the oil, then the flour and salt. Use a spoon to mix everything together until a very rough dough ball forms, although you can use your hands if you prefer.
- Cover the dough with a damp tea towel and let it rest for around thirty minutes so the flour can absorb the water. The damp tea towel will also prevent the dough from drying out and forming a crust.
- For the first stretch and fold, take an edge of the dough, lift it up, and fold it over the top. Turn the bowl a quarter turn and repeat. Continue until the dough starts to firm and becomes harder to stretch. Cover and rest for twenty minutes. Repeat this stretch-and-fold process three more times, resting for twenty minutes between each round. If the dough needs more strength, do a fifth round.
- Once the stretch and folds are complete and the dough passes the windowpane test, place it into a plastic tub or leave it in the bowl. Cover with a plastic bag, plastic wrap, or a reusable shower cap. Leave the dough to proof in a warm, dry place for about twelve hours, or until it has doubled in size. This may take anywhere from ten to fourteen hours depending on conditions.
- When the dough has finished proofing, tip it onto a clean surface without adding extra flour. Let it rest for ten to twenty minutes so the surface dries slightly, making it easier to handle. Flip the dough and gently pull it into a rough square. Fold one edge just past the center, then fold the opposite edge over that. From the narrow edge, roll the dough into a ball. Using both hands, gently pull the ball toward you to create surface tension, lifting and repeating a few times.
- Lightly flour the top of the dough ball, then place it top-side down in a banneton. If your banneton does not have a liner, use a cotton tea towel. Cover with plastic or place inside a bag, then refrigerate for at least four hours and up to twelve hours for the second proof.
- Preheat the oven to 500°F (260°C) with a Dutch oven inside so it heats thoroughly. When ready to bake, tip the dough onto parchment paper and score the top with a razor blade, making a simple half-moon cut if desired. Carefully remove the hot Dutch oven, place the dough inside using the parchment paper, and cover with the lid. Bake for thirty minutes with the lid on, then remove the lid and bake for another thirteen minutes.
- Transfer the bread to a cutting board and let it cool completely before slicing.
Notes
- If you would like to see a more precise timing schedule I have add one in the main blog post above.
- I have also answered a few FAQ's there also.
- See my post also for any images that may help you to see what is involved, there is also a short you tube video.


Leave a Comment