
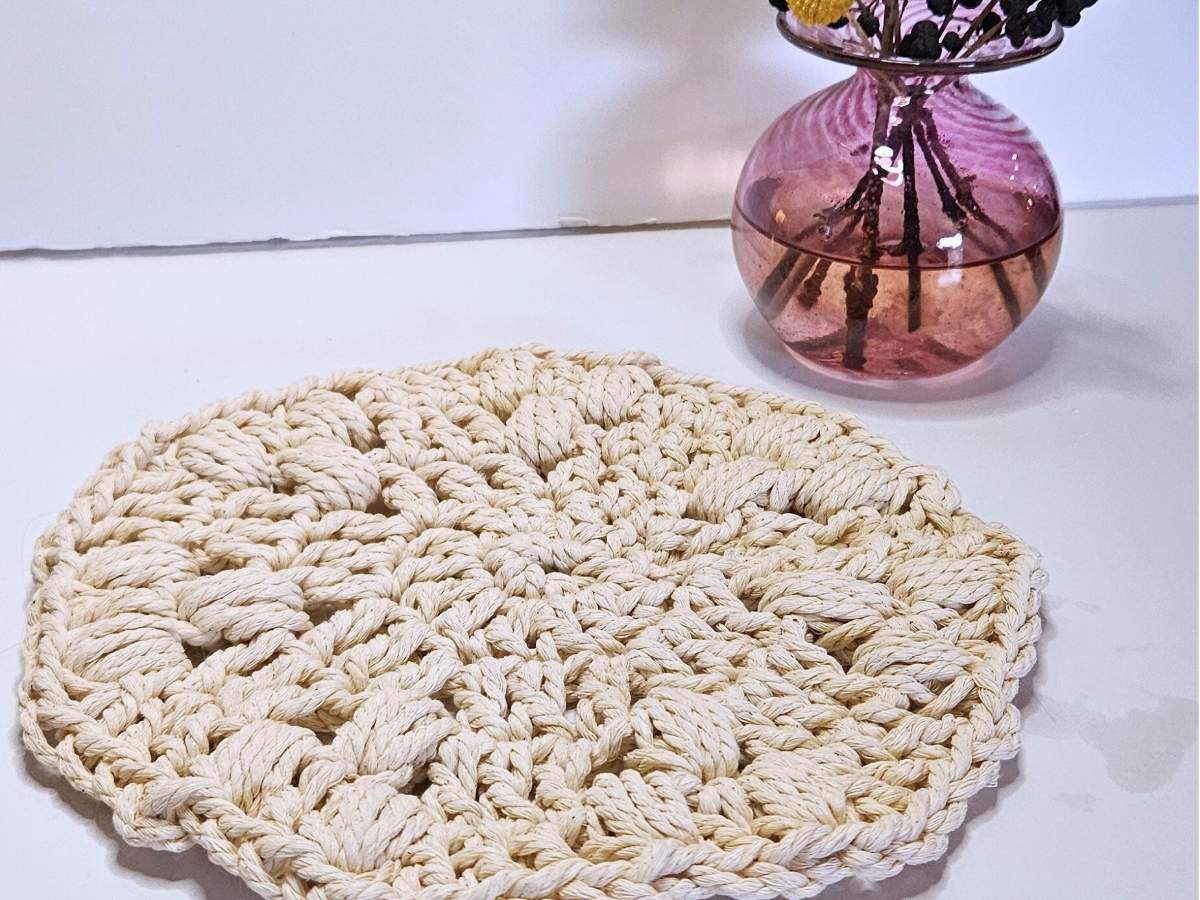
Let me show you how-to make a simple yet elegant circular crochet trivet made with cotton macrame rope. Not only is it easy to make, but it also incorporates some simple stitch techniques that, in turn, add lovely detail. As a result, the trivet is both visually appealing and highly practical for everyday use.
This trivet pattern is made using a cotton macrame rope. It is a great material to work with and perfect for patterns such as these ones. The cotton is able to take the heat from any hot pot placed onto it. It is also chunky enough to protect any surface it is placed onto.

Two of the techniques that you will find in this trivet pattern include, the magic circle and the cluster stitch. Both of these crochet techniques are valuable to learn, as they not only enhance this project but can also be used in many other crochet patterns.
How to crochet a magic circle
To begin, carefully wrap the cord around two fingers twice, moving from back to front to form a cross over the top of your fingers (see images). As you do this, be mindful not to wrap it too tightly. Instead, try to keep your fingers slightly apart, as this will make it easier to insert the hook.

Next, take your hook and go under the first strand, then pick up the second strand and pull it through. Loop the cord over your hook as you would for a single crochet (UK double crochet), then pull through to complete the stitch. However, do not count this as a stitch.

At this stage, you will crochet the specified number of single crochets along the loop, as indicated in the pattern. Be sure to work over both strands, the tail and the main cord to secure the stitches properly.
A tip to remember, place a marker in that first stitch so that you don’t loose where it is.
Now take the tail that should be hanging down from the last crochet stitch and pull it tight. this should close up the stitches in to a circle. Work the circle with you fingers to make sure that the tops of the stiches are all facing outwards ready to be worked.

You have just made a magic crochet circle. This is your base and is now ready for the rest of the pattern.
This is a fantastic stitch to use when starting any circular crochet pattern. Not only does it create a neat and secure beginning, but it also effectively closes up the center, unlike other methods that often leave a hole
What is a crochet cluster stitch
I love this how this stitch looks. It really adds a wonderful dimension to any pattern.
This crochet stitch is made by inserting your hook, pulling the yarn through, and then wrapping the yarn over multiple times within the same stitch.

After doing this you would then be left with multiple stitches on the hook. All of these stiches would be worked at the same time. To see what this will look like please refer to the images.

To finish off the cluster stitch work a slip stitch.
This post includes affiliate links I earn a small commission from at no cost to you, see my full disclaimer
What you need to make a circular crochet trivet

Crochet Terms
- SC, Single crochet, (UK double crochet)
- Ch, Chain
- St, Stitch
- CL, Cluster Stitch. Worked as follows, *yarn over hook (YOH) insert hook through CH space draw through* repeat * to * 3 more times (4 times total), you should have 9 loops on your hook, YOH draw through all 9 loops on the hook.
- Ss, Slip Stitch
- DC, Double crochet, (UK triple crochet)
How to make a circular crochet trivet
Begin by making a magic circle. If needed, refer to the instructions above or watch the video tutorial to learn this technique. For this magic circle add six single crochets (SC) into it.
Round 1. Ch 1, DC 2 in first St, repeat this for the other 5 St. (12 St) Ss in top of the Ch 1.
Round 2. Ch 2. * DC 1, Ch 1, DC 1 in same St. DC 1 *. Repeat *to* for the rest of the round. Ending with a DC 1, Ch 1, DC 1. Ss in top of second Ch.

Round 3. Ch 2. * DC 1. Ch 1. CL in Ch gap Ch 2. DC 2 *. Repeat from *to* for the rest of the round ending with 1 DC. Ss in top of second Ch.
Round 4. Ch 2. * DC 1. Ch 1, CL in Ch gap, DC 1 in top of CL from previous round, CL in next gap Ch 2. DC 1 in next 2 St *. Repeat *to* for the rest of the round ending with DC 1 and a Ss in the top of the Ch 2.

Tie off your work and cut the end leaving a tail.
Using a large eyed embroidery needle weave in any loose tails.
To ensure that it lays flat I would recommend blocking the trivet. Although this is an optional step.
How to block your crochet trivet
- To block the work you gently want to wash the piece in some warm lightly soaped water.
- Gently squeeze out any excess water, by rolling the trivet into a towel and squeezing.
- Take the damp trivet and lay it out flat and leave to dry. If you have blocking mats then I would recommend using them.
Frequently Asked Questions
- How many feet do I need for one trivet? You will need roughly 98 to 100 feet of 3mm macrame rope.


Leave a Comment